


Introducing React Router
React router is one of React's important libraries for creating amazing UI. It allows users to navigate between web pages without reloading the page or interacting with the server. Since React framework doesn’t come with an inbuilt routing feature, react router is the solution and most used.
In traditional websites that are not single-page applications, when we click on a link on the website, it sends a request to a server for a brand new HTML page. React works with SPAs (single-page applications), that handle all of the browser's routing on the frontend and don't send any additional requests to the server for a new page.
In this tutorial, we will learn the following:
React router
How to install React router
Using React router in routing between pages.
Prerequisites
To be able to install and use React router, the reader should have the following:
Node installed on their local development machine
Knowledge of using React
A basic knowledge of HTML, CSS, JavaScript
It is assumed that the reader has basic knowledge of using React and can create components.
There are four important tags needed to create a basic React router in our React application: BrowserRouter, Routes, Route, and Link.
BrowserRouter: It's a component that wraps our entire application and allows us to use the routes within it.
Routes and Route: These are the modules that allows us to set up routes.
Link/NavLink: We use this to create links between pages.
We will learn about implementing the React router in our application by creating a simple React application. Go to your preferred CMD and code editor terminal to create a React application router-tutorial.
npx create-react-app router-tutorial
The command will create a React application called router-tutorial. Then switch to in the app directory, using cd router-tutorial in your code editor and run the command bellow:
npm start
Getting Started
For this tutorial, we will be using three components: Home, About, and User. Within the src folder, we will create a folder called pages and add the files; Home, About, and User to it. For this example, I will use version 6.4.
To install React router, go to your code editor terminal, and in the root directory of your project, type:
npm install react-router-dom@6.4
Now that our router package is installed, we can start setting it up and adding a few different routes.
Next, we will install our BrowserRouter module inside our root component and wrap our entire application inside the BrowserRouter component, and inside this component, we will set up our different routes by specifying which component should be rendered for each route.
App
import { BrowserRouter } from "react-router-dom";

function App() {
  return (
    <BrowserRouter>
      <div className="App">
        Router Tutorial
      </div>
    </BrowserRouter>
  );
}

export default App
Inside the div tag is where all our content is rendered when we go to a specific route. Routes are a parent component for multiple different route components. We also import Routes, Route, and Link packages into our root component.
App
import { BrowserRouter, Routes, Route } from "react-router-dom";

function App() {
  return (
    <BrowserRouter>
      <div className="App">
        <Routes>
        </Routes>
      </div>
    </BrowserRouter>
  );
}

export default App
Next, we create and render different route inside our routes component. We set up a route component for every route in our application. since we have three routes: Home, About and User route. We also import those route to our root component so they can be rendered.
We will create a folder in our src folder with name as pages and create three files: Home.js,About.js, and User.js inside it. Then go to our root component and import the Home, About and User component into our root coomponent.
App
import { BrowserRouter, Routes, Route} from "react-router-dom";

//Pages
import Home from "./pages/Home";
import About from "./pages/About";
import User from "./pages/User";

function App() {
  return (
    <BrowserRouter>
      <div className="App">
        <Routes>
          <Route path="/" element={<Home />} />
          <Route path="about" element={<About />} />
          <Route path="User" element={<User />} />
        </Routes>
      </div>
    </BrowserRouter>
  );
}

export default App
Each route comes with two props which are, path and element. For example, the path in the route component means that if we specify /about, when we go to or click /about in our web-page, it matches with the about component and show an element. The element we want to show is the About page. The path for the home page is usually set as / or index. in this tutorial we will use backslash /.
Home
import React from 'react'

function Home() {
  return (
    <div>
        <div className='home'>
            <h2>Welcome</h2>
            <p>Lorem ipsum dolor sit amet consectetur adipisicing elit.
            Qui officiis in, molestias expedita vero pariatur,
            obcaecati, sit consequatur voluptas blanditiis laboriosam
            velit voluptatem! Magnam corrupti, eos expedita earum
            ratione fugit. Ratione quaerat nam nulla? Vitae doloremque
            tenetur, laboriosam distinctio, modi animi similique nam,
            totam neque quas obcaecati. Tempora voluptatibus id corporis
            dolorum? Cupiditate porro modi cum praesentium?</p>
        </div>
    </div>
  )
}

export default Home
About
import React from 'react'

function About() {
  return (
    <div>
        <div className='about'>
            <h2>Welcome</h2>
            <p>Lorem ipsum dolor sit amet consectetur adipisicing elit.
            Qui officiis in, molestias expedita vero pariatur,
            obcaecati, sit consequatur voluptas blanditiis laboriosam
            velit voluptatem! Magnam corrupti, eos expedita earum
            ratione fugit. Ratione quaerat nam nulla? Vitae doloremque
            tenetur, laboriosam distinctio, modi animi similique nam,
            totam neque quas obcaecati. Tempora voluptatibus id corporis
            dolorum? Cupiditate porro modi cum praesentium?</p>

            <p>Lorem ipsum dolor sit amet consectetur adipisicing elit.
            Qui officiis in, molestias expedita vero pariatur,
            obcaecati, sit consequatur voluptas blanditiis laboriosam
            velit voluptatem! Magnam corrupti, eos expedita earum
            ratione fugit. Ratione quaerat nam nulla? Vitae doloremque
            tenetur, laboriosam distinctio, modi animi similique nam,
            totam neque quas obcaecati. Tempora voluptatibus id corporis
            dolorum? Cupiditate porro modi cum praesentium?</p>

            <p>Lorem ipsum dolor sit amet consectetur adipisicing elit.
            Qui officiis in, molestias expedita vero pariatur,
            obcaecati, sit consequatur voluptas blanditiis laboriosam
            velit voluptatem! Magnam corrupti, eos expedita earum
            ratione fugit. Ratione quaerat nam nulla? Vitae doloremque
            tenetur, laboriosam distinctio, modi animi similique nam,
            totam neque quas obcaecati. Tempora voluptatibus id corporis
            dolorum? Cupiditate porro modi cum praesentium?</p>
        </div>
    </div>
  )
}

export default About
User
import React from 'react'

function About() {
  return (
    <div>
        <div className='about'>
            <h2>Welcome</h2>
            <p>Lorem ipsum dolor sit amet consectetur adipisicing elit.
            Qui officiis in, molestias expedita vero pariatur,
            obcaecati, sit consequatur voluptas blanditiis laboriosam
            velit voluptatem! Magnam corrupti, eos expedita earum
            ratione fugit. Ratione quaerat nam nulla? Vitae doloremque
            tenetur, laboriosam distinctio, modi animi similique nam,
            totam neque quas obcaecati. Tempora voluptatibus id corporis
            dolorum? Cupiditate porro modi cum praesentium?</p>

            <p>Lorem ipsum dolor sit amet consectetur adipisicing elit.
            Qui officiis in, molestias expedita vero pariatur,
            obcaecati, sit consequatur voluptas blanditiis laboriosam
            velit voluptatem! Magnam corrupti, eos expedita earum
            ratione fugit. Ratione quaerat nam nulla? Vitae doloremque
            tenetur, laboriosam distinctio, modi animi similique nam,
            totam neque quas obcaecati. Tempora voluptatibus id corporis
            dolorum? Cupiditate porro modi cum praesentium?</p>

            <p>Lorem ipsum dolor sit amet consectetur adipisicing elit.
            Qui officiis in, molestias expedita vero pariatur,
            obcaecati, sit consequatur voluptas blanditiis laboriosam
            velit voluptatem! Magnam corrupti, eos expedita earum
            ratione fugit. Ratione quaerat nam nulla? Vitae doloremque
            tenetur, laboriosam distinctio, modi animi similique nam,
            totam neque quas obcaecati. Tempora voluptatibus id corporis
            dolorum? Cupiditate porro modi cum praesentium?</p>
        </div>
    </div>
  )
}

export default About
We will now introduce Link or the NavLink that we talked about earliar in this tutorial. If the Link is clicked on, it will look at the route and access the path, if the link matches the element route, it shows that page. We will be using Link instaed of NavLink for this tutorial.
App
import { BrowserRouter, Routes, Route, Link} from "react-router-dom";

//Pages
import Home from "./pages/Home";
import About from "./pages/About";
import User from "./pages/User";

function App() {
  return (
    <BrowserRouter>
      <div className="App">
        <header>
          <nav className="nav-flex">
            <Link to='/'>Home</Link>
            <Link to='about'>About</Link>
            <Link to='user'>User</Link>
          </nav>
        </header>
        <Routes>
          <Route path="/" element={<Home />} />
          <Route path="about" element={<About />} />
          <Route path="User" element={<User />} />
        </Routes>
      </div>
    </BrowserRouter>
  );
}

export default App
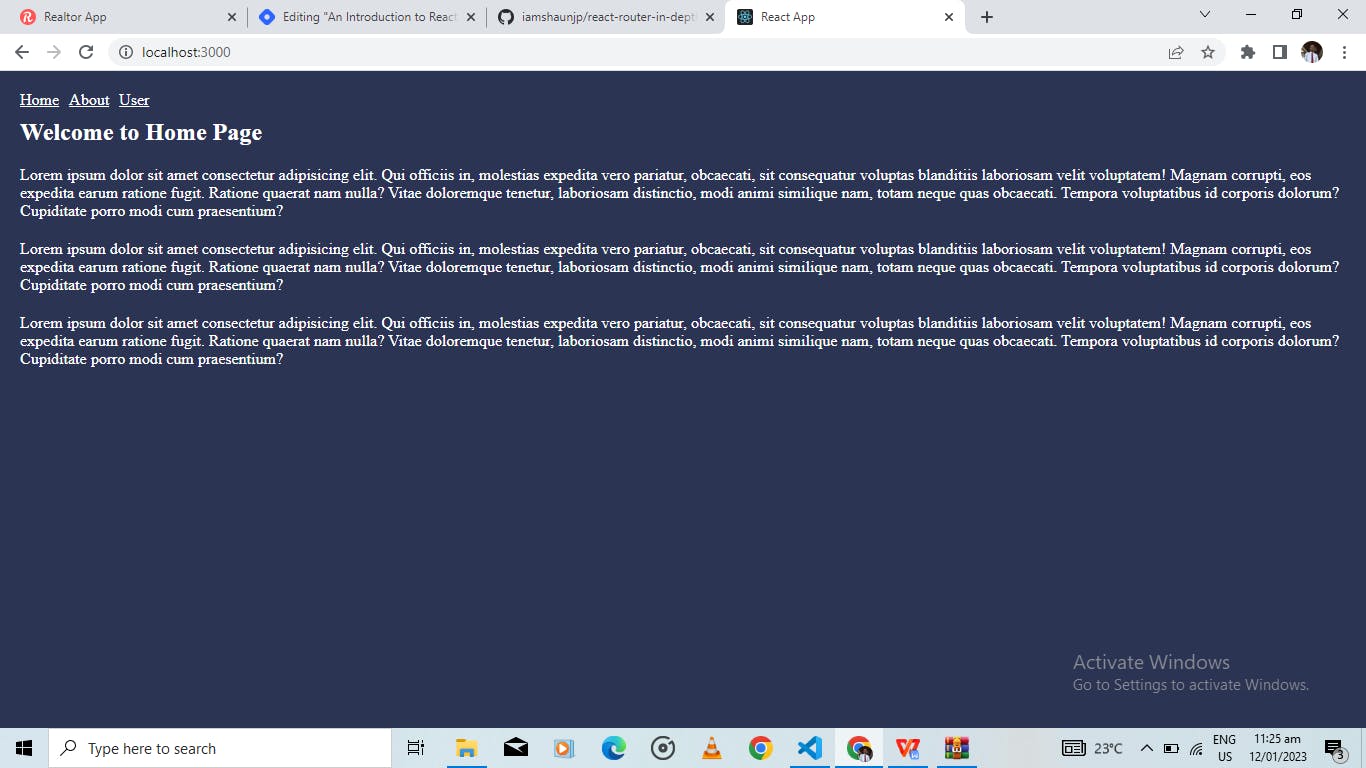
If you have been following the tutorial till now, if you run npm start in your code editor terminal, the image bellow will be dispalyed on your browser. You can now move between Home, About, and User routes.
Conclusion
I hope you have been able to create your first React router application. This tutorial only covers the basic use of React router. If you wish to learn more exciting features about the React router library, you can check out `Net Ninja React router course on youtube.
Leave a comment bellow if you have a question.